
Changing margins in Google Docs might sound a bit technical, but it’s actually quite easy once you get the hang of it. Margins are the spaces around the edges of your document, and adjusting them can help make your work look more polished and professional. Let’s walk through the steps together!
how to adjust margins in google docs
Step 1: Open Your google docs
First things first, open up your document in Google Docs. If you’re not already there, you can easily find it by going to the Google Docs website. Just type “Google Docs” into your search bar, and you’ll see it pop up.

Step 2: Access “Page Setup“
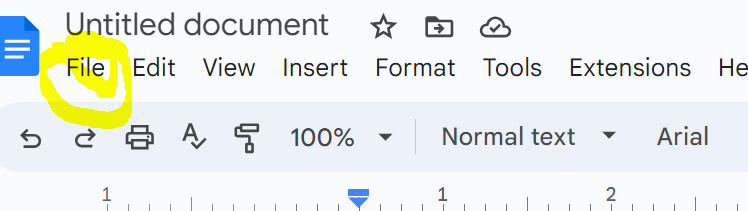
Once you’re in your document, look at the top of the screen. You’ll see a bunch of options like “File,” “Edit,” and “View.” Click on “File.” This will open a drop-down menu. Don’t worry, we’re almost there!
Step 3: Choose “Page Setup“
In the drop-down menu, you’ll see an option called “Page setup.” Click on that, and a new window will appear. This is where the magic happens!

Step 4: Adjust Your Margins
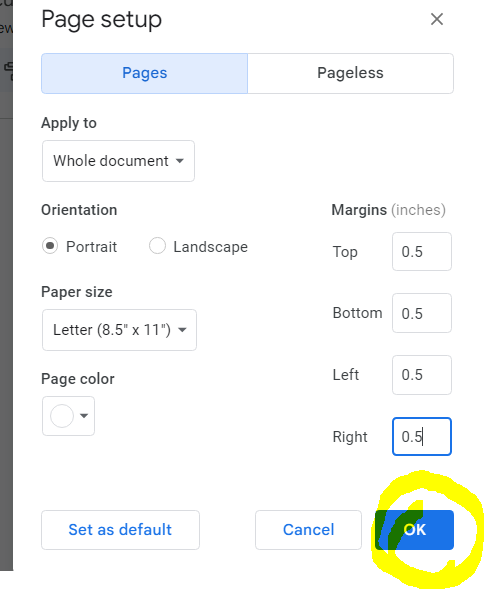
In the new window, you’ll see a section labeled “Margins.” This is where you can make changes. There are four margins you can adjust: top, bottom, left, and right. You’ll notice there are numbers next to each margin. These numbers show how much space there is between the edge of your paper and your text.
Step 5: Set Your Margins
To change a margin, simply click on the number next to it. You can delete the number and type in a new one. For example, if you want more space at the top, increase the number for the top margin. Play around with the numbers until you’re happy with how your document looks.
Step 6: Save Your Changes
Once you’ve adjusted your margins to your liking, don’t forget to click the “OK” button at the bottom of the window. This will save your changes and apply them to your document.
And that’s it! You’ve successfully changed the margins in your Google Docs document. It’s a small tweak that can make a big difference in how your work appears. Whether you need more room for your headers and footers or you want to give your document a cleaner look, adjusting margins is a handy skill to have.
Remember, practice makes perfect. The more you play around with changing margins, the more comfortable you’ll become. So go ahead, give it a try and see how you can make your documents look even better!
how to do a hanging indent on google docs
Previewing Margins
Before finalizing your margin settings, take advantage of the “Margins” preview feature within the “Page setup” window. This preview allows you to visualize how your chosen margin settings will affect the overall layout of your document.
Collaborative Editing and Margin Changes
One of the key advantages of Google Docs is its collaborative editing feature. If you’re working on a document with multiple contributors, be mindful that margin changes might affect the overall formatting.
Troubleshooting Margin Issues
Encountering unexpected margin changes or formatting discrepancies? Ensure that you’ve saved your document and refresh the page. If the issue persists, revisit the “Page setup” window to double-check your margin settings.
Best Practices for Margins
When setting margins, consider the type of document you’re creating. Academic papers may require specific margin guidelines, while creative documents like flyers offer more flexibility.
Importance of Proper Margins
Proper margins contribute to the readability and visual appeal of your document. They create a comfortable reading experience and prevent the content from feeling cramped.
Types of Margin Changes
Google Docs offers several types of margin changes to suit your document’s needs:
a. Standard Margins
The default setting for most documents, offering a balanced amount of white space on all sides.
b. Narrow Margins
Useful for maximizing the content area on the page, often employed for lengthy reports or academic papers.
c. Wide Margins
Ideal for documents that require annotations or comments in the margins, allowing ample space for notes.
d. Custom Margins
Tailor margins according to your preference, setting different dimensions for top, bottom, left, and right margins.
When is it beneficial to change margins in Google Docs?
Optimal Times to Adjust Margins in Google Docs
Changing margins in Google Docs can offer distinct advantages in various situations. By tailoring margins to specific needs, you can enhance the overall appearance and readability of your documents. Here are some instances where tweaking margins can prove beneficial:
- Formatting Requirements: When working on documents that need to adhere to specific formatting guidelines, adjusting margins becomes crucial. Academic papers, business reports, and official documents often have predefined margin requirements. By customizing margins, you can ensure your content aligns with these guidelines while maintaining a professional appearance.
- Creating Eye-Catching Designs: If you’re crafting documents with a creative flair, altering margins can play a significant role in design. Marketing materials, posters, and brochures benefit from strategic margin adjustments that allow images and text to be positioned attractively. Wider margins might provide space for graphics, while narrower ones can create a sleek and modern look.
- Maximizing Content Space: Sometimes, you might want to fit more content on a single page without compromising readability. Adjusting margins can help you achieve this goal. By slightly reducing margins, you can accommodate more text without overwhelming the reader. This can be particularly useful for lengthy documents, such as research papers or manuals.
- Emphasizing Key Information: In documents that require emphasis on specific sections, altering margins can direct the reader’s focus. Enlarging the left or right margin of a paragraph can draw attention to important content. This technique is often used in resumes or CVs to highlight skills or achievements.
- Improving Print Layout: If you’re planning to print your Google Docs document, adjusting margins can impact the final print layout. Expanding margins can prevent text from getting cut off during printing, ensuring a neat appearance on paper.
- Enhancing Readability: Optimal margins contribute to a document’s overall readability. By adjusting margins to provide sufficient white space, you make the content easier on the eyes. This is especially important for lengthy documents, as well-spaced margins prevent the reader from feeling overwhelmed.
- Tailoring to Different Devices: In an increasingly digital world, documents are often viewed on various devices. By adjusting margins, you can optimize the document’s appearance for screens of different sizes. This ensures that your content remains readable and visually pleasing, whether it’s viewed on a computer, tablet, or smartphone.
- Customizing Personal Projects: When creating personal documents like invitations, newsletters, or journals, adjusting margins allows you to add a personal touch. You can align text and images in a way that suits your unique style and preferences.
In conclusion, changing margins in Google Docs offers flexibility and customization to match the specific requirements and intentions of your documents. By strategically adjusting margins, you can enhance aesthetics, maintain readability, adhere to guidelines, and cater to diverse viewing platforms. It’s a simple yet powerful tool that empowers you to create documents that are both visually appealing and functional.
How to do 1 inch margins on Google Docs?
Setting 1-Inch Margins
- File Option: Within the document, locate the “File” option at the top left corner. Click on it to open a dropdown menu.
- Page Setup: From the dropdown menu, select “Page setup.” A window will appear, presenting various page settings.
- Margin Settings: Look for the “Margins” section within the “Page setup” window. Here, you’ll find options for adjusting the margins.
- Custom Margins: Click on the drop-down menu next to “Margins.” Choose the “Custom” option.
- Adjusting Margins: A dialog box will pop up, allowing you to specify the margin measurements. Enter “1” into the top, bottom, left, and right margin fields.
- Applying Changes: After entering the measurements, click the “Apply” button to confirm your 1-inch margin settings.
Frequently Asked Questions
Q1: Can I set different margins for odd and even pages?
A: Currently, Google Docs does not offer a built-in feature for setting distinct margins for odd and even pages.
Q2: What are standard margins
A: The standard margins for a typical document in English (US) language are usually set to 1 inch on all sides. This means there is a 1-inch space between the content of the document and the edges of the paper. The standard margin settings help ensure that there is enough space for text, images, and other content without the risk of it getting cut off when printing or viewing the document.
Q3: What size is A4 in Google Docs?
A: In Google Docs, the closest paper size to the A4 size is the “Letter” size. The A4 paper size is commonly used in many parts of the world, but in the United States, the “Letter” size is more common. The “Letter” size in Google Docs is 8.5 inches wide and 11 inches tall. This is very close to the dimensions of the A4 paper, which is 8.27 inches wide and 11.69 inches tall. So, if you’re working in Google Docs and want a size similar to A4, you can choose the “Letter” size. Just remember that there might be a slight difference in dimensions, but it’s usually not noticeable for most documents
Q4: What size format is Google Docs?
A:
Google Docs offers a variety of page size formats to choose from, depending on your needs. The default page size in Google Docs is the “Letter” size, which is 8.5 inches wide and 11 inches tall. This is a common paper size in the United States.
However, Google Docs provides options for other page sizes as well. Some of these include:
- Legal: 8.5 inches wide and 14 inches tall. This is longer than the “Letter” size.
- A4: While Google Docs doesn’t have an exact A4 option, you can use the “Letter” size (8.5 x 11 inches) as a close approximation.
- Custom: You can also set a custom page size by going to “File” > “Page setup” and entering the desired dimensions.
These options allow you to choose the most suitable page size for your specific project, whether it’s a standard letter, a legal document, or a custom layout
-
Andre Hakkak Net Worth, Wife, Parents, Age, House
-
Taylor swift height and weight