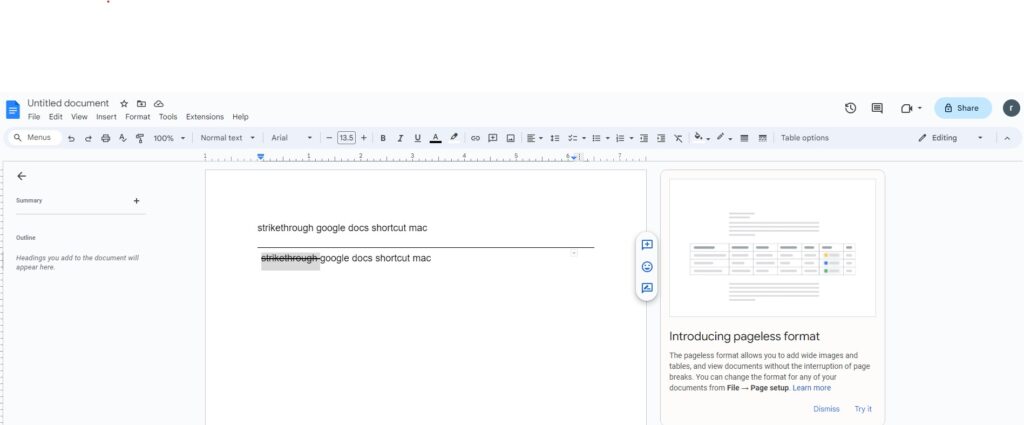
When you’re in the midst of writing, you might come across moments where you’d like to draw attention to specific text by crossing it out. This action involves adding a horizontal line through the text, creating a strikethrough effect. Let’s take a look at what this looks like in practice: you are an awesome person.
- Strikethroughs have a range of useful applications:
- 1. Signaling Text for Deletion
- One valuable use of strikethroughs is to clearly mark text that you intend to delete. By drawing a line through it, you unmistakably highlight that this content is meant for removal or replacement.
- 2. Identifying Outdated Information
- Text that has become outdated over time can be easily identified using strikethroughs. By applying this formatting, you maintain the historical context while ensuring readers understand that the information is no longer current.
- 3. Showcasing Task Completion
- In the realm of task lists and to-do items, strikethroughs are a handy tool. When a task is completed, crossing it out with a horizontal line offers a visual representation of progress and achievement.
- 4. Infusing Humor or Unrelated Messages
- Strikethroughs also open the door to creativity. You can use them to deliver humorous or unrelated messages within your writing, adding a touch of playfulness to your content.
- In the following sections, we’ll delve into the methods of applying strikethroughs using Google Docs.
In this article, we’ll see how to strikethrough or cross out text when writing using Google Docs.
What is Strikethrough & Why Use It?
In the world of digital communication, every element of formatting plays a role in conveying your message effectively. One such formatting feature that holds its own is the strikethrough. Let’s explore what strikethrough entails and why incorporating it into your content can be a strategic move.
Understanding Strikethrough
Strikethrough is a text formatting technique where a horizontal line is placed through a section of text, creating a visual effect that draws attention to that particular content. This crossed-out appearance adds a layer of significance to the text, guiding readers to interpret it in a distinct way.
Why Use Strikethrough?
The utility of strikethrough extends beyond mere aesthetics. It serves several practical and strategic purposes:
1. Highlighting Deletions or Revisions
When editing or revising content, you often encounter sections that need to be removed or replaced. Strikethrough becomes a powerful tool in this scenario. By crossing out the text, you clearly indicate that it’s slated for deletion, while still keeping it visible for context.
2. Indicating Obsolete Information
In the dynamic landscape of information, data can quickly become outdated. Strikethrough offers a way to address this issue. By crossing out text that’s no longer accurate, you convey that the content has evolved and might not be relevant anymore.
3. Showcasing Task Completion
Strikethrough is commonly seen in to-do lists or task management systems. When an item on the list is completed, it’s crossed out. This simple act visually communicates accomplishment and progress, motivating further action.
4. Expressing Humor or Contradiction
Strikethrough can also be used creatively to add a touch of humor or contradiction to your content. By crossing out certain words or phrases and replacing them with alternatives, you infuse a playful element that engages your readers.
Incorporating Strikethrough: A Tactical Approach
Adding strikethrough to your text can be achieved through straightforward methods, such as keyboard shortcuts or formatting options provided by word processing tools like Google Docs. By mastering these techniques, you gain the ability to wield strikethrough effectively and enhance your communication.
In conclusion, strikethrough is more than just a visual element; it’s a powerful tool that adds layers of meaning and depth to your content. Whether you’re clarifying revisions, indicating completion, or injecting a hint of humor, the strikethrough technique has the potential to elevate your communication strategy. Embrace this formatting feature to wield a subtle yet impactful influence over how your readers perceive and engage with your words.
I the specific text you want to apply the strikethrough formatting to. To do this, click at the start of the text, hold down the mouse button, and drag the cursor to the end of the text
how to strikethrough google docs
Are you worried about how to do strikethrough google docs than now feeling relief. we will provide you full detail We have two methods to strikethrough google docs, we can use when crossing out text in Google Docs – using a shortcut command or choosing the strikethrough option from the Format tab in the Google Docs header section
How to strikethrough google docs shortcut
Do you want to learn about strikethrough google docs shortcut, and strikethrough google docs shortcut mac than you have reached in right palace Here are the steps to follow using a shortcut for strikethrough google docs
- Open Google Docs: Begin by launching Google Docs and creating a new document or opening an existing one where you’d like to incorporate strikethrough text.
- Enter Your Text: Type or paste the desired text into the document. This can be a sentence, paragraph, or any portion of text you wish to enhance with the strikethrough effect.
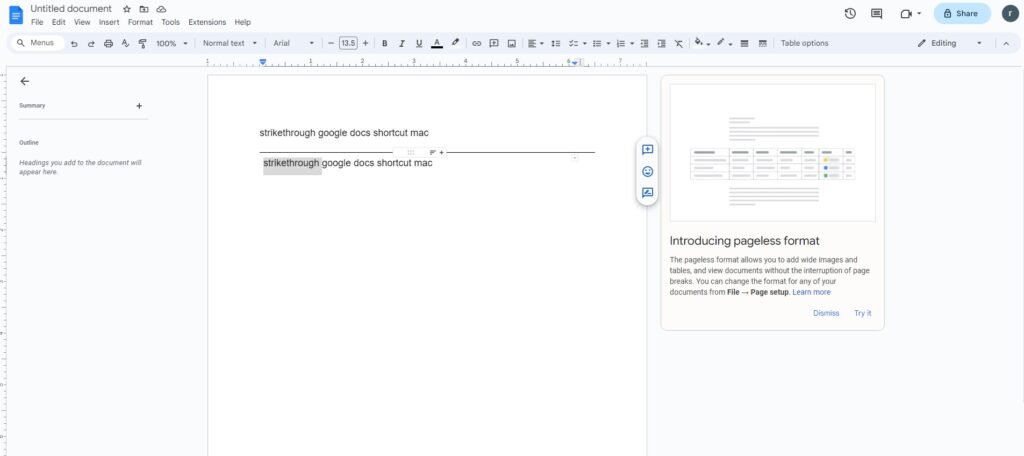
- Select the Text: Highlight the specific text you want to apply the strikethrough formatting to. To do this, click at the start of the text, hold down the mouse button, and drag the cursor to the end of the text

- On windows, press
Alt+Shift+5. - On Mac, press
⌘+Shift+X.
we have used a shortcut command to cross out text in Google Docs.

strikethrough google docs Using the Format Tab
- Open Google Docs: Begin by opening the Google Docs document that you want to work on.
- Select Text: Highlight the text that you want to apply strikethrough formatting to. Click and drag your cursor over the text to select it.
- Format Tab: Look for the “Format” tab in the top menu of Google Docs. It should be located next to the “Insert” and “Table” tabs.
- Text Formatting Options: Click on the “Format” tab. A dropdown menu will appear.
- Text: In the dropdown menu, locate and hover your cursor over the “Text” option. This will expand another submenu.
- Strikethrough: Within the “Text” submenu, you’ll see various text formatting options. One of these options is “Strikethrough.” Click on “Strikethrough” to apply the formatting to the selected text.
remove strikethrough google docs
- If you want to remove the strikethrough formatting from the text, follow the same steps. Go to the “Format” tab, hover over “Text,” and click on “Strikethrough” to toggle it off.
Your selected text will now have strikethrough formatting applied, making it appear with a line through it in your Google Docs document. If you encounter any difficulties, ensure that you are using the correct version of Google Docs and that the menu options are as described.